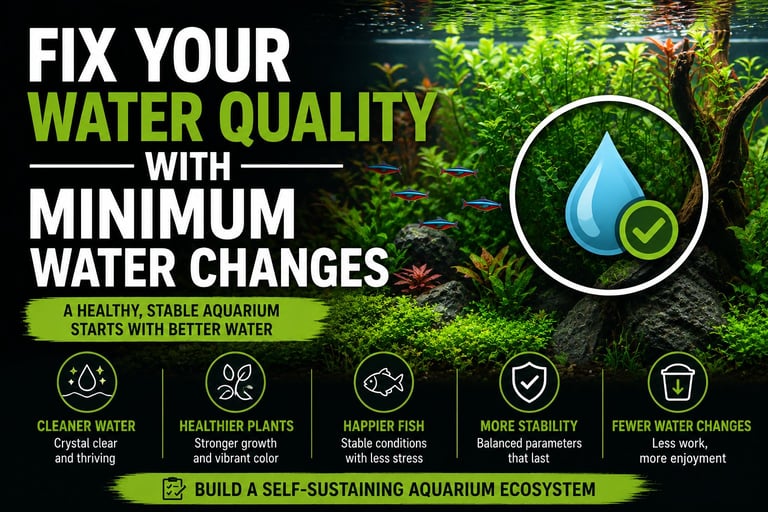
Aquascaping Guide

Dutch Aquascaping: Skip the Hype

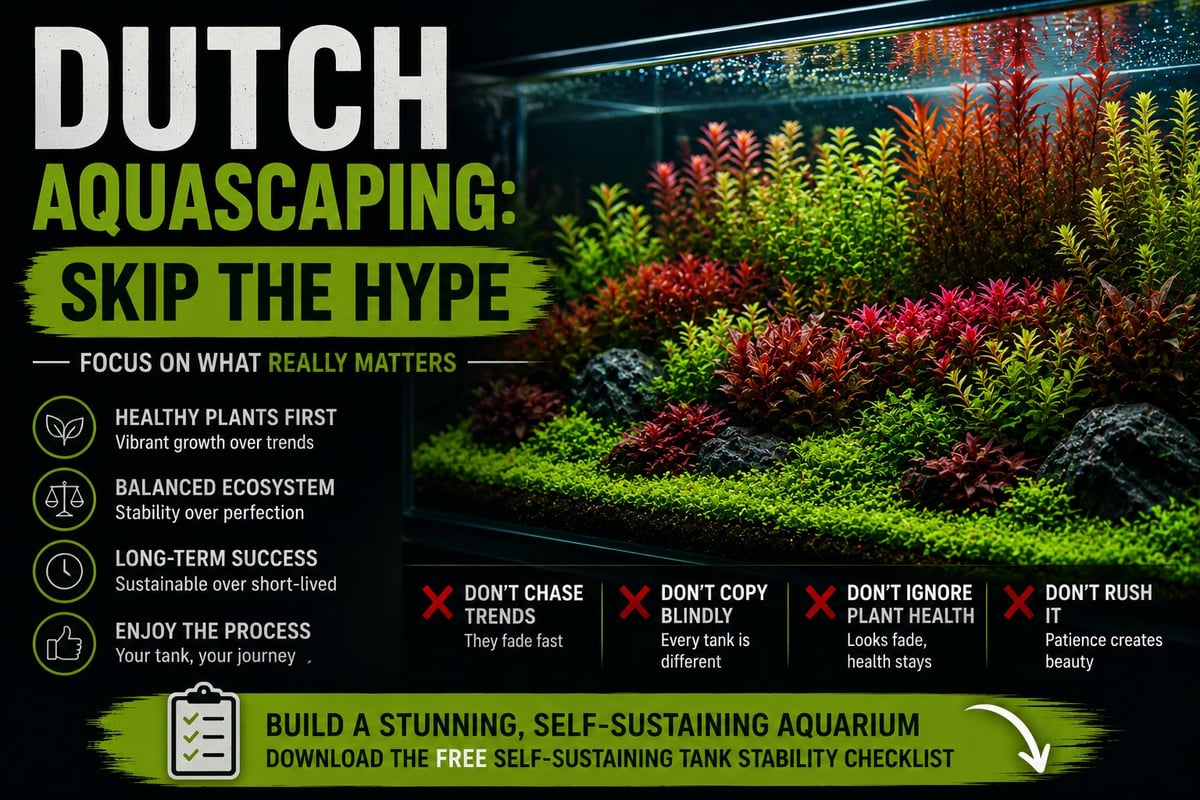
Forget the Instagram fantasies and marketing BS. Here's what Dutch aquascaping actually is - plant arrangements that work, equipment that matters, and realistic expectations from someone who's done it for decades.

Aquascape Oasis Team

Aquascaping Realists

18 min read
The freshwater fish tank is beautifully planted with green tropical plants.

Lush Dutch-Style Planted Aquascape

What Dutch Aquascaping Actually Is

Let's cut through the marketing nonsense. Dutch aquascaping isn't some mystical art form. It's simply arranging plants in groups by species, creating visual depth with height variations, and maintaining clean sight lines. That's it. No sacred geometry, no spiritual plant placement - just good design principles that have worked for decades.

The Father Fish Truth About Dutch Style

  • Street arrangement: Plants grouped by species, like a well-organized garden
  • Height variation: Foreground, midground, background - creates natural depth
  • Clean pathways: Visual corridors that guide the eye through the tank
  • Density focus: Lots of plants, minimal hardscape - plants are the stars
  • Maintenance intensive: More upkeep than nature style, but manageable

What Dutch Style Is NOT

❌ Instagram Myths:

  • • Only achievable with astronomical budgets
  • • Only for "advanced" aquarists
  • • Must use expensive ADA everything
  • • Requires expensive professional setups
  • • Can only use rare, expensive plants

✅ Reality:

  • • Investment scales with your vision
  • • Intermediate skill level
  • • Quality equipment matters, brand doesn't
  • • Weekly maintenance mostly
  • • Common plants work great

Bottom line: Dutch aquascaping is about creating a lush, organized underwater garden. It's more work than throwing some plants in randomly, but it's not rocket science. If you can follow basic design principles and maintain consistent care, you can do this.

Beautiful freshwater aquascape with live aquarium plants, Frodo stones, redmoor roots covered by java moss and a school of blue neon tetra fish. Standing in room with window and curtain.

Dutch Style in Practice

Plant groupings, depth layers, and clean sight lines working together

Equipment That Actually Matters

Tank Selection Reality

ADA tanks are beautiful. They're also expensive. Here's what actually matters for Dutch aquascaping:

  • Minimum 75 gallons (280L)

    You need space for proper plant groupings

  • Low iron glass (nice to have)

    Regular glass works fine, but low iron looks better

  • Good rimless design

    Easier planting access, better viewing angles

Budget option: Quality starfire glass tanks are available at reasonable prices. Premium branded equivalents cost significantly more. Your plants don't care about the brand.

Filtration: What Works

Canister Filters

Fluval, Eheim, or equivalent. Hidden, reliable, adequate flow.

Lily Pipes (optional)

Premium lily pipes are nice but expensive for glass tubes. Quality alternatives work fine for a fraction of the price.

Skip the Sump

Overkill for planted tanks, adds complexity without benefit.

Lighting: Don't Overthink It

PAR meters, spectrum graphs, and light reviews are mostly BS. Here's what actually matters:

  • Medium-high intensity: 30-50 PAR at substrate level
  • Full spectrum LED: Anything 6500K-8000K works
  • Adjustable intensity: You'll need to dial it in
  • 8-10 hour photoperiod: Consistency matters more than intensity

Reality check: Chihiros, Fluval, Current USA - all work fine. Spend money on plants, not overpriced light fixtures.

CO2: The Non-Negotiable

You CANNOT do proper Dutch aquascaping without CO2. Period. Here's the practical setup:

Oxygen diffuser under water pumping a lot of small bubbles. Oxygen under water. Bubbles under water, macro.

CO2 diffusion is essential for Dutch aquascapes

✅ What You Need:

  • • 5-10lb CO2 tank
  • • Dual stage regulator
  • • Solenoid valve
  • • Bubble counter
  • • Diffuser or reactor
  • • Drop checker

❌ Skip the BS:

  • • Expensive "plant-specific" regulators
  • • CO2 art premium everything
  • • Inline diffusers (pain to maintain)
  • • Liquid carbon (doesn't work for Dutch style)

Equipment Strategy: Quality vs Brand Premium

💸 Premium Route (Brand Focus):

  • Premium branded tank & stand Expensive
  • Designer lily pipes & filter Expensive
  • Premium lighting system Expensive
  • Premium CO2 system Expensive
  • Result: High Cost

✅ Smart Route (Function Over Brand):

  • Quality glass tank & stand Reasonable
  • Reliable canister + pipes Reasonable
  • Quality LED light Reasonable
  • Complete CO2 setup Reasonable
  • Result: Sensible Cost

💡 Father Fish reality: Both setups will grow the same plants equally well. Focus your budget on plants, not brand names.

Visual Journey: What to Expect

Dutch aquascapes don't happen overnight. Here's what your tank progression actually looks like - no Instagram filters, no perfect timing tricks.

view on my beautifull aquarium

Dense Plant Street Formation

Plant groups create visual pathways in Dutch aquascaping style

Week 1-2

Planting complete, water cloudy, plants melting, total disaster look

Week 3-6

New growth appears, algae battles, constant adjustments, cautious optimism

Week 7-12

Plants establish, streets form, first "wow" moments, weekly trims begin

3+ Months

Mature layout, confident trimming, people stop scrolling to stare

Visual Red Flags (And How to Fix Them)

🚫 What Looks Wrong:

Sparse "Island" Planting

Individual plants scattered around like decorations

Uniform Height Wall

Everything the same height, no depth or perspective

Color Chaos

Every plant a different color, no harmony or flow

✅ What Looks Right:

Dense Plant Streets

Groups of 10-20+ stems creating visual pathways

Layered Depth

Foreground carpet, midground streets, background fill

Harmonious Colors

3-4 main colors maximum, gradual transitions

Plant Selection Reality Check

Here's the truth about plant selection: You don't need rare, expensive plants to create stunning Dutch aquascapes. Most of the plants in champion Dutch tanks are common species grown well. Focus on growth habits, maintenance needs, and how they fit your layout - not their price tag or rarity.

Foreground: Keep It Simple

Dutch foregrounds are carpets, not grass. You want plants that spread naturally and don't require constant trimming.

Cryptocoryne parva

Slow growing, bulletproof, natural carpet formation

Sagittaria subulata

Spreads via runners, grass-like appearance

Cryptocoryne wendtii varieties

Different colors, reliable, various sizes

Skip: HC Cuba, Monte Carlo

High maintenance, not traditional Dutch style

Midground: The Workhorses

This is where Dutch tanks shine. Multiple plant groups with different textures, colors, and heights creating visual streets.

Rotala species (rotundifolia, indica)

Easy coloration, predictable growth, stems

Ludwigia repens

Red coloration, fast growth, forgiving

Hygrophila species

Various leaf shapes, robust growth

Alternanthera reineckii

Reliable reds/pinks, compact growth

Background: The Foundation

These create your backdrop. Fast growing, filling, and should complement not compete with your midground stars.

Vallisneria species

Tall grass effect, spreads naturally, low maintenance

Echinodorus species (Amazon swords)

Large leaves, focal points, very hardy

Cabomba species

Feathery texture, traditional Dutch plant

Limnophila sessiliflora

Fast growing, good filler, easy to manage

close up the beauty of the aquascape plant in the aquarium

Different plant textures create visual interest

Accent Plants: Use Sparingly

1-2 species maximum. These are your statement plants that draw the eye to focal points.

Anubias species

Dark green contrast, slow growth

Java Fern varieties

Unique textures, reliable performers

Smart Plant Buying Strategy

✅ Father Fish Approach:

  • Start with 3-5 species total - master these first
  • Buy tissue culture when possible - no pests, no algae
  • Plan for propagation - you'll need lots of stems
  • Budget appropriately for plants - quality initial stocking is important
  • Local club swaps - best deals, proven plants

❌ Expensive Mistakes:

  • Buying every "cool" plant - creates chaos, not design
  • Rare/expensive species first - learn with cheap plants
  • Buying single stems - you need groups of 10-20+
  • Chain store plants - poor quality, often mislabeled
  • No quarantine process - algae and pest disasters

Layout Principles: The Dutch Formula

Dutch aquascaping follows a formula. It's not random artistic expression - it's organized design with specific principles that create visual harmony. Master these basics and you'll create better layouts than most Instagram "artists."

The "Street" System

Think of it like city planning. Each plant species gets its own "street" or area, with clear pathways between different neighborhoods.

  • Species groupings: 15-30+ stems of the same plant together
  • Clear boundaries: No mixing species within groups
  • Visual pathways: Eye can travel through the layout
  • Height transitions: Gradual changes, not sudden jumps

Pro tip: Start with your tallest background plants and work forward. Each layer should be clearly shorter than the one behind it.

Color & Texture Balance

Dutch tanks are about contrast. Different leaf shapes, colors, and growth patterns create visual interest without chaos.

Green Foundation (60-70%)

Various greens provide the base canvas

Red Accents (20-30%)

Reds/pinks as strategic focal points

Special Colors (5-10%)

Purples, oranges - use very sparingly

The Golden Rules of Dutch Layout

✅ Always Do:

  • Rule of thirds: Avoid centering everything
  • Odd numbers: Groups of 3, 5, 7 look more natural
  • Focal points: 1-2 main areas that draw the eye
  • Depth layers: Minimum 3 distinct depth planes
  • Plant mass: 70%+ of substrate should have plants

❌ Never Do:

  • Symmetrical layouts: Looks artificial and boring
  • Single plant specimens: Everything needs friends
  • Mixing species in groups: Breaks the street system
  • Dominant hardscape: Rocks/wood shouldn't be stars
  • Too many colors: Creates visual chaos

Maintenance Reality: What They Don't Tell You

Let's be honest about maintenance. Dutch aquascapes are more work than nature-style tanks. Anyone telling you otherwise is lying or trying to sell you something. But it's manageable if you know what you're getting into.

Weekly Tasks (2-3 hours)

  • Trimming (45-60 minutes)

    Stem plants grow fast, need regular cuts to maintain shape

  • Water change (30 minutes)

    50%+ weekly to remove excess nutrients

  • Glass cleaning (15 minutes)

    Algae scraping, equipment cleaning

  • Observation (ongoing)

    Check for problems, plan next week's work

Monthly Tasks (1-2 hours)

  • Replanting/Propagation

    Remove old stems, replant fresh cuttings

  • Fertilizer adjustment

    Monitor plant health, adjust dosing

  • Equipment maintenance

    Filter cleaning, CO2 system check

  • Growth assessment

    Which plants are thriving, what needs changes

The Father Fish Reality Check

🚫 If You Can't Commit To:

  • • 2-3 hours every weekend
  • • Consistent weekly trimming
  • • Regular water changes
  • • Learning plant growth patterns
  • • Dealing with algae outbreaks

✅ Consider Instead:

  • • Nature aquascaping (lower maintenance)
  • • Walstad method tanks
  • • Simple community tank with plants
  • • Waiting until your schedule opens up
  • • Starting with a smaller practice tank

💡 Truth: A neglected Dutch tank looks worse than no aquascape at all. Be honest about your available time before starting.

Trimming Techniques That Work

Trimming is where Dutch aquascapes live or die. Here's the practical guide to keeping your plant streets looking sharp without destroying the layout.

Man hands cutting the pot to plant new water plant, cryptocoryne x willisii, in aquarium at home.

Professional Plant Maintenance

Proper technique prevents damage and promotes healthy growth

The Street Trimming Method

BEFORE: Overgrown Chaos

Different heights, uneven growth, lost street definition

AFTER: Clean Street Formation

Uniform street height, clean lines, visual flow restored

Key insight: Trim each plant street to the same height, not individual stems. This maintains the group effect that makes Dutch layouts work.

Weekly Trimming Schedule

Week 1: Aggressive Trim

  • • Cut stem plants back 40-50%
  • • Remove old/damaged leaves
  • • Replant healthy tops

Week 2: Light Maintenance

  • • Pinch growing tips for bushiness
  • • Remove any algae-covered leaves
  • • Minor height adjustments

Week 3-4: Shape Refinement

  • • Maintain street boundaries
  • • Trim runners and side shoots
  • • Evaluate overall composition

Pro tip: Always trim on the same day each week. Plants respond to consistent schedules, and you'll develop a rhythm that becomes automatic.

Essential Trimming Tools

Aquascape Scissors

Long, curved scissors for precise cuts in tight spaces

Budget: $15-25

Premium: ADA $80+ (nice but not necessary)

Tweezers/Forceps

For planting and removing debris without disturbing layout

Budget: $8-15

Length: 10-12 inches minimum

Algae Scraper

Keep glass spotless - algae ruins the Dutch aesthetic

Magnetic: $10-20

Blade type: For stubborn spots

Father Fish Wisdom:

"Expensive tools don't make you a better trimmer. Practice and consistency do. I've seen stunning Dutch tanks maintained with $30 worth of basic tools, and disasters created with $300 premium setups. Buy decent tools, then focus on technique."

Common Disasters (And Quick Fixes)

Every Dutch tank hits these problems. Don't panic. Here's what's actually happening and how to fix it without starting over.

The Goal: Balanced Ecosystem

Most problems stem from imbalance. Successful Dutch aquascapes achieve harmony between lighting, CO2, nutrients, and biological processes. When one element is off, everything suffers.

  • Plants thriving and pearling
  • Fish healthy and active
  • Minimal algae presence
  • Stable water parameters
Red Cherry Shrimp on a moss, freshwater aquarium

Healthy ecosystem indicators

Algae Explosions

Week 2-4 nightmare scenario

What You're Seeing:

  • • Green film on everything
  • • Hair algae in plant groups
  • • Brown diatom coating
  • • Plants looking sad and covered

Actual Fix (Not Forums BS):

  • • Reduce lighting to 6 hours temporarily
  • • Daily 25% water changes for 1 week
  • • Manual removal with tweezers
  • • Check CO2 levels (probably too low)
  • • Add more fast-growing stems

Timeline: Usually resolves in 2-3 weeks with consistent action. Don't add chemicals or "miracle cures."

Massive Plant Die-Off

Week 1-2 panic mode

What's Happening:

  • • Leaves turning yellow/transparent
  • • Stems rotting from bottom up
  • • New plants just... dying
  • • Total beginners' panic

Why It's Normal:

  • • Plants adjusting to your water
  • • Submersed vs emerged growth forms
  • • New root system developing
  • • Part of the process, not failure

Action: Remove rotting parts, be patient, new growth will emerge. Don't change everything at once.

CO2 Disasters

Fish deaths and pH swings

Emergency Signs:

  • • Fish gasping at surface
  • • pH dropping rapidly
  • • Pearling stops completely
  • • Plants looking "gassed"

Immediate Response:

  • • Turn off CO2 injection immediately
  • • Increase surface agitation
  • • 50% water change
  • • Check all connections and settings

Prevention: Start with low rates, use drop checkers, never adjust CO2 dramatically in one day.

Slow/No Growth

Plants just sitting there

Most Likely Causes:

  • • Insufficient CO2 (most common)
  • • Poor light penetration
  • • Nutrient lockout from bad substrate
  • • Wrong plant expectations

Systematic Diagnosis:

  • • Test CO2 levels first
  • • Check PAR at plant level
  • • Verify fertilization schedule
  • • Consider plant species requirements

Reality check: Some plants are just slow. Anubias grows like molasses. Cryptocorynes take months to establish.

Emergency Response Kit

Keep these on hand for when things go wrong. Because they will, and panicking makes everything worse.

🧰 Emergency Supplies:

  • API test kit - pH, ammonia, nitrate
  • Prime water conditioner - removes chlorine/chloramine
  • Battery-powered air pump - for oxygen emergencies
  • Activated carbon - removes medications/toxins
  • Extra filter media - biological backup

📞 Emergency Actions:

  • Stop feeding immediately - don't add more waste
  • Water change first - 50% is usually safe
  • Increase surface agitation - more oxygen
  • Document with photos - track changes
  • One change at a time - don't panic-adjust everything

🔥 Golden Rule: When in doubt, do a water change and wait 24 hours before making other changes. Most aquarium disasters are caused by panic, not the original problem.

Professional Aquascaping Services

Ready to create your dream Dutch aquascape without the learning curve? Our professional aquascaping team brings decades of experience to design, build, and maintain stunning aquatic landscapes that thrive from day one.

Complete Design & Installation

From concept to completion

Custom Layout Design

Professional blueprints tailored to your space and preferences

Equipment Selection & Setup

Right-sized systems that work reliably for years

Plant Selection & Installation

Carefully chosen species that complement each other

System Optimization

CO2, lighting, and fertilization fine-tuned for success

Perfect for: First-time aquascapers, busy professionals, or anyone wanting guaranteed results from day one.

Ongoing Maintenance

Keep your aquascape pristine

Weekly Professional Service

Expert trimming, cleaning, and system checks

Water Quality Management

Testing, adjustments, and preventive care

Plant Health & Trimming

Professional techniques to maintain perfect plant streets

Equipment Maintenance

CO2 refills, filter cleaning, light optimization

Perfect for: Busy schedules, vacation coverage, or maintaining competition-level aquascapes.

Learn from the Experts

🎓 One-on-One Consultation:

  • Personalized Assessment - Evaluate your current setup and goals
  • Problem Solving - Diagnose and fix ongoing issues
  • Custom Action Plan - Step-by-step roadmap for success
  • Equipment Recommendations - Right tools for your specific needs

🏆 Hands-On Training:

  • Trimming Masterclass - Learn professional techniques in person
  • System Optimization - Master CO2, lighting, and fertilization
  • Plant Selection Guidance - Choose the right species for your goals
  • Ongoing Support - Email and phone support for 90 days

Why Choose Professional Aquascaping Services?

Save Time

Skip the 6-month learning curve and enjoy results immediately

Avoid Mistakes

Professional expertise prevents costly errors and plant failures

Guaranteed Results

Professional-grade outcomes from day one, not month six

Stress-Free

Enjoy the beauty without worrying about the technical details

Ready to Create Your Dream Aquascape?

Let our professional team handle the complexity while you enjoy the beauty. From design to maintenance, we've got you covered.

Free Initial Consultation Professional Installation Ongoing Support Available